一、安全框架是什么
安全框架的本质就是一堆过滤器的组成,目的在于保护系统资源的访问是被允许的,所以在到达资源之前会做一系列的验证工作,这些验证工作通过一系列的过滤器完成。安全框架通常的功能有认证、授权、防止常见的网络攻击,以此为核心拓展其他功能。比如session管理,密码加密,权限管理等功能。
二、常见的安全框架
1. Apache Shiro
功能
Shiro 干净利落地 处理身份认证,授权,会话管理和加密。 Apache Shiro 的首要目标是易于使用和理解。框架应该尽可能掩盖复杂的地方,暴露一个干净而直观的 API,来简化开发人员在应用程序安全上所花费的时间。
四大核心功能——身份验证,授权,会话管理和加密
- Authentication :简称为“登录”,这是一个证明用户是谁的行为。
- Authorization :访问控制的过程,也就是决定“谁”可以去访问“什么”。
- Session Management : 管理用户特定的会话,即使在非 Web 或 EJB 应用程序。
- Cryptography :通过使用加密算法保持数据安全同时易于使用。
额外功能
- Web Support: web 支持的 API 能够轻松地保护 Web 应用程序。
- Caching :缓存是用来确保操作的快速而又高效的。
- Concurrency :Apache Shiro 利用它的并发特性来支持多线程应用程序。
- Testing :测试功能来帮助编写单元测试和集成测试。
- Run As :一个允许用户 以 另一个用户身份(如果允许) 运行的功能,有时候在管理脚本时很有用
- Remember Me :在会话中记住用户的身份,这样用户只需要在强制登录时登录。
特点
Shiro 框架具有 直观、易用 等特性,同时也能提供了 健壮的安全性 ,在常规的企业级应用中,其实也够用了。
2. SpringSecurity
Spring Security是一个 功能强大且高度可定制的,主要负责为 Java 程序提供声明式的身份验证和访问控制的安全框架。其前身是Acegi Security ,后来被收纳为 Spring 的一个子项目,并更名为了Spring Security。
Spring Security的底层主要是基于 Spring AOP 和 Servlet 过滤器来实现安全控制 ,它提供了全面的安全解决方案,同时授权粒度可以在 Web请求级和方法调用级来处理身份确认和授权。
SpringSecurity是由Spring提供的一个安全框架,依赖于Spring Freamwork的基础功能,也可以将Bean交由Spring管理,充分利用Spring的IOC和AOP,为系统提供安全服务,如果项目使用Spring为基础使用SpringSecurity整合再合适不过。如果你的项目不是用Spring开发的就不要考虑此技术了。
功能
Spring Security 的核心功能主要包括如下几个:
- 认证: 解决 “你是谁” 的问题–>解决的是系统中是否有这个“用户”(用户/设备/系统)的问题,也就是我们常说的“登录”。
- 授权: 权限控制/鉴别,解决的是系统中某个用户能够访问哪些资源,即“你能干什么”的问题。Spring Security 支持基于 URL 的请求授权、方法访问授权、对象访问授权。
- 防护攻击: 防止身份伪造等各种攻击手段。
- 加密功能: 对密码进行加密、匹配等。
- 会话功能: 对 Session 进行管理。
- RememberMe功能: 实现“记住我”功能,并可以实现token令牌持久化。
两者区别
- SpringSecurity基于Spring开发,与SpringBoot、SpringCloud更容易集成
- SpringSecurity拥有更多功能,如安全防护,对OAuth授权登录的支持
- SpringSecurity拥有良好的扩展性,更容易自定义实现一些定制需求
- SpringSecurity的社区资源比Shiro更丰富
- Shiro相较于SpringSecurity更轻便,简单,使用流程更清晰,上手容易,反观SpringSecurity属于重量级,学习难度比Shiro高
- Shiro不依赖于其他框架可独立运行,而SpringSecurity需要依赖于Spring容器运行
三、创建SpringSecurity项目
1. 创建Springboot项目
JDK17, maven
依赖:web, lombok, SpringSecurity
使用到的技术版本:
- JDK17
- Springboot3.3.2
- Spring Security6.3.1
- MySQL8.0
- Mybatis plus3.5
- JWT
- Redis
引入依赖
<dependency>
    <groupId>org.springframework.boot</groupId>
    <artifactId>spring-boot-starter-security</artifactId>
</dependency>
2. 引入SpringSecurity之后的不同
接口需要先登录才能访问,默认用户名user,密码出现在控制台中。
自定义用户名密码:
spring:
  security:
    user:
      name: admin
      password: dfjb
      roles: ['admin']
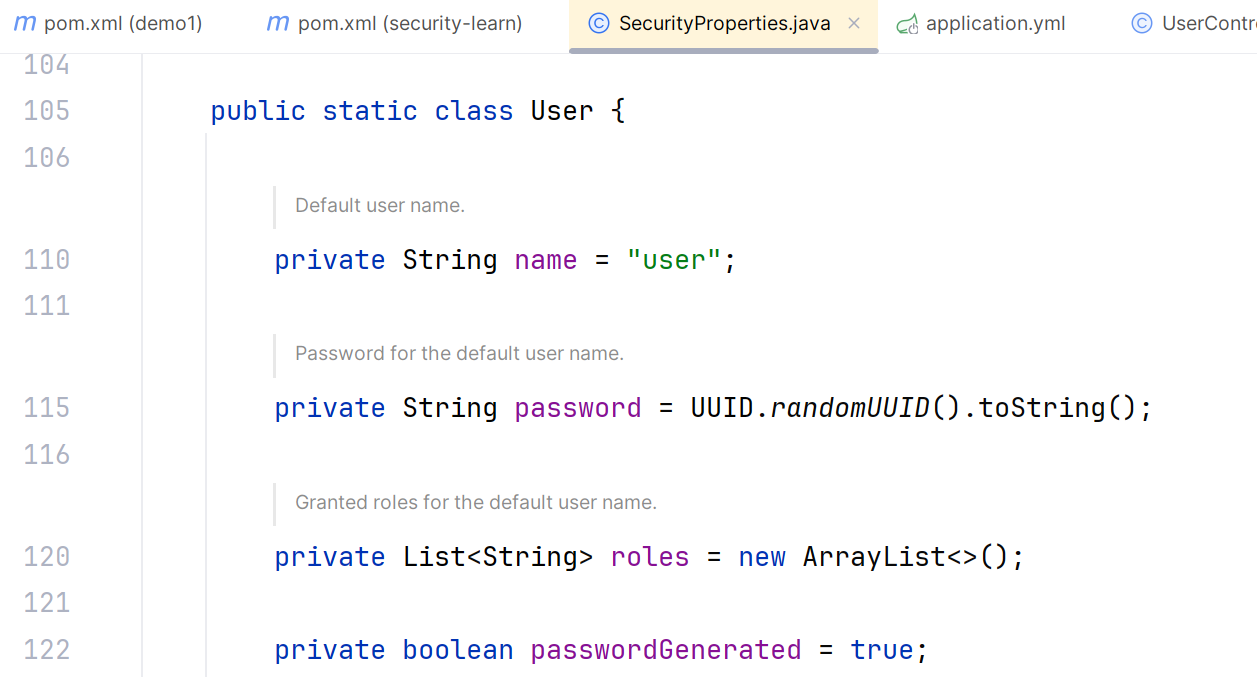
默认的用户名密码来自SpringSecurity源码的SecurityProperties类中的User内部类,定义了用户名、密码以及权限。
四、认证
1. 流程
基于内存的用户分析认证流程。
2. Security配置类
定义用户名和密码
通过配置类的方式实现基于内存的用户名、密码和角色的定义,后边切换成数据库。
@Configuration
@EnableWebSecurity // 标记为一个Security类,启用Spring Security的自定义配置
public class SecurityConfig {

    // 自定义用户名、密码
    // UserDetailsService:根据用户名加载用户,找到的话返回用户信息【UserDetails类型】,找不到的话抛出异常
    // UserDetails:存储了用户的信息
    @Bean
    public UserDetailsService userDetailsService(){
        // 定义用户信息
        // 构建管理员
        UserDetails adminUser = User
                .withUsername("yrxuser")
                .password("{noop}123456")
                .roles("USER", "ADMIN")
                .build();
        // 构建普通用户
        UserDetails vipUser = User
                .withUsername("yrxvip")
                .password("{noop}123456")
                .roles("USER", "ADMIN")
                .build();
        // 将用户存储到SpringSecurity中
        InMemoryUserDetailsManager userDetailsManager = new InMemoryUserDetailsManager();
        // 创建两个用户,SpringSecurity在运行时就会知道有两个用户
        userDetailsManager.createUser(adminUser);
        userDetailsManager.createUser(vipUser);
        return userDetailsManager;
    }

}
密码加密处理
SpringSecurity提供密码加密工具:PasswordEncoder,具体实现使用BCryptPasswordEncoder。
密码编码器
@Bean
public PasswordEncoder passwordEncoder(){
    // 构建密码编码器
    return new BCryptPasswordEncoder();
}
测试
@SpringBootTest
@Slf4j
public class PassTest {
    @Autowired
    private  PasswordEncoder passwordEncoder;
    // 生成密码加密后的字符串
    @Test
    public void test1() {
        String pass = "123456";
        // 编码
        String encode = passwordEncoder.encode(pass);
        log.info("加密后的密码:{}", encode);
        // 匹配密码
        boolean isTrue = passwordEncoder.matches(pass, encode);
        log.info("密码是否正确:{}", isTrue);
    }
}
3. 自定义登录页面
定义登录页面
引入Thymeleaf依赖
<dependency>
    <groupId>org.springframework.boot</groupId>
    <artifactId>spring-boot-starter-thymeleaf</artifactId>
</dependency>
登录页面要写在resources/templates目录下。
登录页面
<!DOCTYPE html>
<html lang="en" xmlns:th="http://www.thymeleaf.org">
<head>
    <meta charset="UTF-8">
    <title>自定义登录页面</title>
</head>
<body>
<form action="/login" method="post">
    用户名:<input type="text" name="username" placeholder="用户名"><br/>
    密码:<input type="password" name="password" placeholder="密码"><br/>
    <input type="submit" value="登录">
</form>
</body>
</html>
首页
<!DOCTYPE html>
<html lang="en">
<head>
    <meta charset="UTF-8">
    <title>首页</title>
</head>
<body>
    登录成功!
</body>
</html>
请求
@Controller
@Slf4j
public class PageController {

    // 跳转到登录页面
    @GetMapping("/toLogin")
    public String toLogin() {
        log.info("跳转到登录页面");
        return "login";
    }
}
配置
配置跳转登录页面的toLogin请求不需要拦截。
// 权限相关的配置
// 安全框架本质是一堆过滤器,称之为过滤器链,每一个过滤器功能都不同.
// toLogin不要拦截
@Bean
public SecurityFilterChain securityFilterChain(HttpSecurity httpSecurity) throws Exception {
    // 配置关闭csrf机制,token在请求头中
    httpSecurity.csrf(csrf->csrf.disable());
    // toLogin请求不拦截
    httpSecurity.authorizeHttpRequests(
            auth->auth
            .requestMatchers("/toLogin")// 匹配的资源路径
            .permitAll() // 允许访问
            .anyRequest()// 其他的任意请求
            .authenticated() // 需要认证之后
    );
    return httpSecurity.build();
}
登录实现
需求1:系统中有资源,没有登录时,访问自动跳到登录页面;登录成功则可正常访问。
需求2:登录成功后自动跳转首页。
PageController
// 跳转到登录页面
@GetMapping("/toLogin")
public String toLogin() {
    log.info("跳转到登录页面");
    return "login";
}

@GetMapping("/index")
public String index() {
    log.info("跳转到首页");
    return "home";
}
login表单
<form th:action="@{/doLogin}" method="post">
    用户名:<input type="text" name="username" placeholder="用户名"><br/>
    密码:<input type="password" name="password" placeholder="密码"><br/>
    <input type="submit" value="登录">
</form>
表单登录配置
// 表单登录
httpSecurity.formLogin(
        form->form
                .loginPage("/toLogin") // 跳转到自定义的登录页面
                .loginProcessingUrl("/doLogin") // 处理前端的请求,与form表单的action一致
                .usernameParameter("username")
                .passwordParameter("password")
                .defaultSuccessUrl("/index")
);
五、授权
在用户认证之后,会去存储用户对应的权限,并给资源设置对应的权限。
SpringSecurity支持两种粒度的权限:
- 基于请求的:在配置文件中配置路径,可以使用**通配符
- 基于方法的:在方法上注解实现
- 动态权限:用户权限被修改之后,不需要用户退出,会自动刷新,也不需要修改代码
1. 基于配置的授权
角色配置
httpSecurity.authorizeHttpRequests(
        auth->auth
                .requestMatchers("/hello").hasRole("ADMIN")
    			// 有任何一个角色都可以
    			//.requestMatchers("/hello").hasAnyRole("USER","ADMIN")
    			// 设置访问权限
    			.requestMatchers("/hello").hasAuthority("hello:show")
                .requestMatchers("/toLogin")// 匹配的资源路径
                .permitAll() // 允许访问
                .anyRequest()// 其他的任意请求
                .authenticated() // 需要认证之后
);
访问/hello要有ADMIN角色。
权限配置
UserDetails adminUser = User
                .withUsername("yrxuser")
                .password("$2a$10$YE")
                .roles("USER")
                .authorities("hello:show")
                .build();
httpSecurity.authorizeHttpRequests(
        auth->auth
    			// 设置访问权限
    			.requestMatchers("/hello").hasAuthority("hello:show")
                .requestMatchers("/toLogin")// 匹配的资源路径
                .permitAll() // 允许访问
                .anyRequest()// 其他的任意请求
                .authenticated() // 需要认证之后
);
3. 基于方法的授权
SpringSecurity6版本使用@EnableMethodSecurity。默认情况下会激活@PrePost注解,并在内部使用AuthorizationManager。
新版本改进:
- 使用简化的AuthorizationManager。
- 支持直接基于Bean的配置,而不需要扩展GlobalMethodSecurityConfiguration。
- 使用Spring AOP构建,删除抽象并允许您使用SpringAOP构建块进行自定义。
- 检查是否存在冲突的注释,以确保明确的安全配置。
- 符合JSR-250
- 默认情况下启用
@PreAuthorize、@PostAuthorize、@PreFilter、@PostFilter
@EnableMethodSecurity // 启用基于方法的鉴权
public class SecurityConfig {
}
方法上的注解会把类上的注解覆盖掉。
@PreAuthorize
测试@PreAuthorize注解
作用:使用在类或者方法上,拥有指定的权限才能访问
String类型的参数:语法是Spring的EL表达式
hasRole会去匹配Authorizes,但是会在hasRole的参数前面加一个Role前缀
定义权限的时候要写`ROLE_`
role和authorizes的关系是:role是一种复杂的写法,有ROLE_前缀
authorizes是role的简化写法
@PreAuthorize("hasRole('hello:show')")
不需要添加前缀
@PreAuthorize("hasAuthority('hello:show')")
@PostAuthorize
// 方法返回时的校验
@PostAuthorize("returnObject.length()>6")
@GetMapping("/hello/post")
public String sayHelloPost(){
    log.info("hello");
    return "hello";
}
@PostFilter
// @PostFilter注解:过滤符合条件的返回值
@PostFilter("filterObject.length()>2")
@GetMapping("/hello/list")
public List<String> helloList(){
    List<String> hellos = new ArrayList<>();
    hellos.add("一");
    hellos.add("二字");
    hellos.add("三个字");
    return hellos;
}
@PreFilter
- 过滤掉符合条件的数据
- 数据必须是Collection/Map/Array
@PreFilter(value = "filterObject.username.length() > 3")